Introduction
A few weeks ago, a small architecture firm in Delhi went through a stressful situation. Their office NAS drive was not accessible, and all their files stored on the NAS server suddenly disappeared from the network. That drive contained years of design drawings, project reports, and confidential client data. Every time they tried to open a folder, an error message appeared saying the network path could not be found. Restarting the system, checking cables, and even changing IP settings did not help. The team felt helpless because all their hard work was trapped inside the device. It was only after reaching out to a professional NAS Server Data Recovery team that they could finally breathe again when their important files were safely restored.
A NAS drive, or Network Attached Storage, is one of the most convenient ways to store and share data across multiple computers. Many Indian offices and even homes rely on it for storing photos, videos, business documents, and backups. But like any storage device, it can stop working without warning. Power fluctuations, drive corruption, or RAID errors can suddenly make your NAS inaccessible. The comforting truth is that there are safe ways to recover data from NAS drive without losing important files. This article explains why NAS drives become inaccessible, the right steps to bring your data back, and when to seek professional help from Techchef Data Recovery for reliable and secure recovery.
Understanding NAS Drives and Why They Become Inaccessible
A Network Attached Storage (NAS) drive is like your personal cloud storage. It allows multiple users to access, share, and store data securely from different devices over a network. Many Indian homes and small businesses rely on NAS systems for convenience, easy backups, and centralized data management. However, just like any storage device, NAS drives are not immune to issues.
The main reason why a NAS drive not accessible situation happens is because of one or more of the following causes:
1. Power Surges or Sudden Shutdowns: Frequent power cuts or electrical fluctuations can interrupt the operation of NAS drives and damage internal components.
2. RAID Configuration Errors: NAS devices often use RAID setups for data protection, but incorrect configuration or RAID rebuild failure can make the entire storage inaccessible.
3. File System Corruption: If files get corrupted due to improper shutdowns, software crashes, or malware, the NAS may fail to read data correctly.
4. Overheating or Physical Damage: Constant use without proper ventilation can lead to overheating. Dust and mechanical wear may also affect drive health.
5. Firmware Glitches: Sometimes, a failed firmware update or corruption in the NAS operating system can make it unresponsive.
Ignoring early warning signs like slow performance, unusual noises, or error messages can lead to complete NAS hard drive failure recovery situations. Remember, most of these problems start small. Acting early gives you a much better chance of recovering everything safely.
Common Reasons Why Your NAS Drive Is Not Accessible
Understanding why your NAS stopped responding helps you take the right steps. Let’s look at some of the most frequent causes.
1. Network or IP Conflicts
If your NAS device is connected through a home or office network, sometimes the IP address can change automatically. This may cause the NAS to disappear from your network. You might see an error like “NAS not found” or “Unable to connect.” In such cases, check your router settings and assign a static IP to your NAS. This simple step often restores connectivity without any data loss.
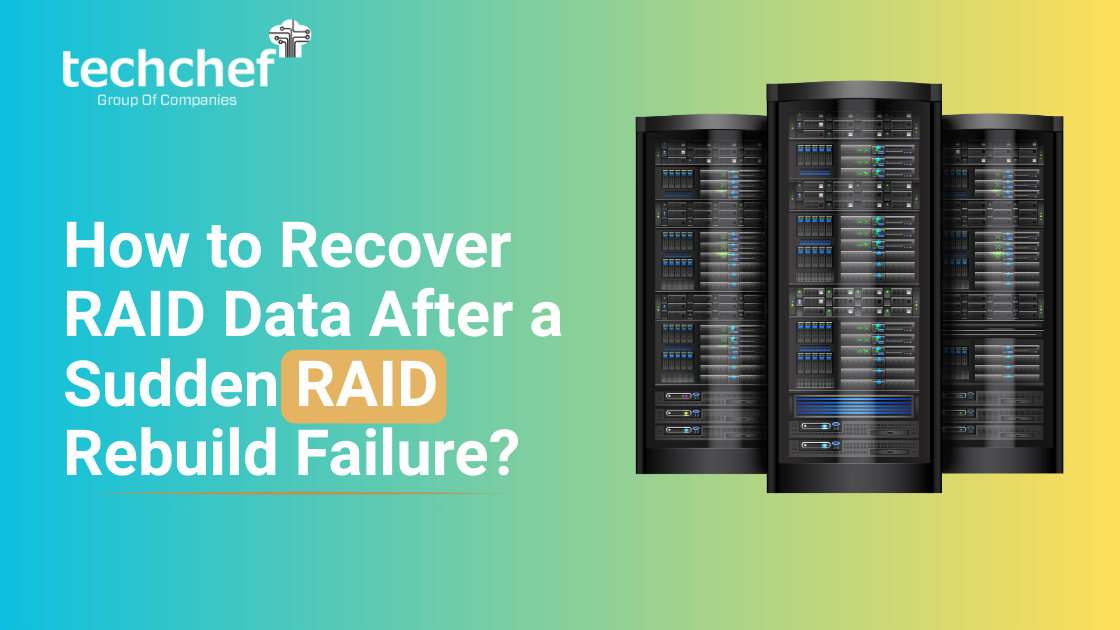
2. RAID Rebuild Failure
NAS systems often use RAID (Redundant Array of Independent Disks) for better performance and reliability. However, when one drive in the RAID fails, and you attempt a rebuild incorrectly, you risk overwriting existing data. Rebuild failures are one of the biggest reasons for NAS Data Recovery cases in India. If your NAS shows “degraded mode” or “rebuilding,” do not interrupt it and avoid restarting repeatedly.
3. File System Corruption
Just like on computers, NAS drives have file systems such as EXT4 or Btrfs. A sudden power outage or improper disconnection can corrupt these systems. The NAS then struggles to locate files, making folders appear empty or inaccessible. Using the wrong repair tools can make things worse. It is safer to seek Techchef Data Recovery support before attempting any DIY fixes.
4. Overheating and Hardware Wear
Long hours of operation, poor ventilation, or dust build-up can cause overheating. Components inside the NAS, such as hard drives or fans, can fail due to constant heat. Over time, you might start hearing strange sounds like grinding or clicking. This is an early sign of NAS hard drive failure recovery needs. Turn off the NAS immediately and allow it to cool before restarting. If the noise continues, do not force it.
5. Accidental Deletion or Formatting
Sometimes, data loss is simply caused by human error. One wrong click while managing partitions or performing maintenance can delete entire volumes. The good news is that deleted files are often recoverable if the drives have not been rewritten. Avoid storing new data on the NAS after accidental deletion, and contact professionals who can recover data from NAS drive safely.
6. Power Interruptions or Surges
Frequent voltage drops are a common issue in many Indian households and offices. A sudden cut while the NAS is writing data can corrupt storage sectors. Using a UPS or surge protector is a small investment that can prevent huge losses later.
7. Outdated Firmware
Every NAS manufacturer releases firmware updates to improve performance and security. Ignoring these updates can make your NAS unstable or vulnerable to errors. If your NAS is running slow or freezing, check for the latest firmware from the manufacturer’s site. Always back up your data before installing updates
💡 Did You Know?
Nearly 70% of NAS failures in India are linked to power surges and overheating. A small step like using a UPS or placing your NAS in a cool, dust-free area can save you from expensive NAS Data Recovery in the future.
Step-by-Step Guide: How to Recover Data from an Inaccessible NAS Drive
When your NAS drive is not accessible, it feels like the heart of your digital life has stopped beating. Years of family memories, office documents, or business records suddenly vanish from sight. But here is the truth many people do not realize right away your data is still there, stored safely inside the disks. You only need to follow the right steps to bring it back. The key is to stay calm, avoid quick fixes, and take one careful step at a time.
Let us go through a simple and safe NAS Data Recovery process that anyone can understand.
Step 1: Stop Using the NAS Immediately
The first and most important rule is to stop using the NAS as soon as you notice it becoming slow, unresponsive, or inaccessible. Every extra second it stays on can increase the risk of further data corruption. If the device is still powered on, shut it down gently through its management interface or hold the power button for a few seconds until it switches off.
Using the NAS after noticing errors is like driving a car with a flat tyre it only makes the situation worse. The internal hard drives might be trying to read and write data repeatedly, causing physical damage to the platters. By switching it off, you protect what is still recoverable.
Step 2: Check All Physical and Network Connections
Once the device is powered down, begin with the basics. Many NAS drives not accessible issues arise simply because of loose cables, faulty switches, or IP conflicts. Check the Ethernet cables and power connections carefully. Try plugging them into a different port or using another LAN cable.
Also, check whether the router or network switch is functioning correctly. Sometimes, a simple reset of the network settings restores the NAS visibility. However, if you still cannot access the drive after doing this, do not force any resets or reconfigurations. The goal here is to eliminate minor connection issues before assuming that the NAS drive failure is internal.
Step 3: Access the NAS Drives Individually
If the NAS remains inaccessible after basic checks, remove the hard drives one by one and connect them individually to a desktop system using a SATA-to-USB connector or a direct SATA port. This step helps confirm whether the problem is with the drives or the NAS enclosure.
Be careful while doing this. Note down the order of the drives because it is important if your NAS uses RAID. Never try to format or initialize any of the drives when prompted by your computer. Simply check if they are detected in the Disk Management section. If you see your partitions but cannot open them, your file system might be corrupted. At this stage, the safest choice is to stop and seek NAS Server Data Recovery support from trusted professionals.
Step 4: Use NAS Management or Diagnostic Software
Most NAS devices from brands like Synology, QNAP, or Western Digital have built-in management utilities. These tools can often detect minor issues and provide error reports. Access your NAS dashboard through its web interface (for example, typing its IP address in the browser).
If the interface opens but data is missing or inaccessible, check the system logs. They can reveal whether it is a network, disk, or RAID-related problem. However, if the dashboard itself does not load, avoid using third-party recovery software unless you are absolutely sure it is safe for your model. Incorrect tools can rewrite critical RAID information, making NAS hard drive failure recovery much more difficult later.
Step 5: Avoid Rebuilding RAID Without Guidance
Rebuilding RAID might look like a good idea, especially if the NAS shows a degraded or failed volume. But without a proper backup or technical knowledge, you could permanently overwrite your existing data. This is one of the most common mistakes users make while trying to recover data from NAS drive themselves.
Each RAID type (RAID 0, RAID 1, RAID 5, RAID 6, etc.) stores data in a different way. Even a small change in drive order or rebuild configuration can destroy the original data structure. That is why it is always recommended to contact professionals who specialise in NAS Data Recovery before attempting any RAID rebuild.
Step 6: Avoid Using Free or Unknown Recovery Tools
It is natural to search online for quick solutions when the NAS drive is not accessible. You may find many free recovery tools claiming to restore your data in minutes. But most of these programs are designed for simple USB drives or single hard disks, not complex NAS RAID setups. Using them without understanding your NAS’s architecture can lead to severe data corruption.
If your data is valuable, personal memories, company accounts, or client files it deserves safe handling. Only reliable recovery software or trusted service providers like Techchef Data Recovery should be considered at this point.
Step 7: Create a Clone or Disk Image Before Recovery
Before any recovery attempt, always clone the NAS drives or create full disk images. This ensures that even if something goes wrong during recovery, you still have an untouched copy of the original data. A disk image captures every bit of data, including damaged sectors.
Professionals at Techchef Data Recovery follow this process strictly because it is one of the safest ways to handle NAS hard drive failure recovery. By working on cloned copies instead of the actual drives, they eliminate the risk of permanent loss.
Step 8: Seek Professional NAS Data Recovery Support
If all your attempts fail or if the NAS is completely undetected, it is time to get help from experts who understand the inner workings of these systems. At this stage, avoid opening the NAS enclosure further or trying to repair the drives yourself. Modern NAS systems are highly sensitive, and even dust particles can cause further harm once the drives are exposed.
A professional NAS Server Data Recovery service like Techchef Data Recovery has cleanroom facilities, advanced imaging tools, and experienced engineers who can extract data safely from even heavily damaged NAS systems. They follow precise steps to rebuild the RAID, recover lost partitions, and restore files without altering their structure.
Step 9: Verify and Backup Recovered Data
Once the recovery process is completed, do not rush to reuse the same NAS immediately. First, verify that all recovered data is accessible and complete. Check your important folders, test file integrity, and confirm that no corruption remains. After that, store the recovered data on a separate external drive or a secure cloud backup.
This is also a good time to re-evaluate your data protection habits. Set up automatic backups, invest in surge protectors, and schedule regular NAS health checks. Preventing future issues is always easier than facing another round of NAS Data Recovery.
Step 10: Learn from the Experience
Every data loss incident teaches us something. Whether it was a sudden power cut, a hardware fault, or human error, note down what went wrong and how it can be prevented next time. Educate your team or family members about safe data practices, especially if multiple users access the same NAS system.
Treat your NAS like a digital bank. It holds valuable assets that deserve protection. Once you have your files back, promise yourself to back them up regularly and keep your system maintained. This small habit will save you stress and expense in the future.
💡 Did You Know?
Nearly 80% of successful NAS Data Recovery cases happen when users switch off their NAS immediately after noticing inaccessibility. The sooner you act, the higher your chances of getting back every single file without damage.
When to Seek Professional NAS Data Recovery Help
Knowing when to stop trying on your own and call experts can save you from complete data loss. Here are signs that you need professional help:
1. The NAS does not power on at all.
2. You hear clicking, grinding, or beeping sounds from the drives.
3. The NAS continuously reboots or shows RAID errors.
4. Drives are detected in the system but cannot be accessed.
5. You accidentally formatted or deleted the storage volume.
Professionals handle NAS drives in controlled cleanroom environments where dust and static cannot damage the internal platters. They use specialized tools to clone each drive before attempting recovery. This ensures your original data remains untouched.
Techchef Data Recovery has helped thousands of users in India restore their data from RAID failures, power surges, and accidental deletions. Their team has experience with all major NAS brands and file systems, ensuring safe, transparent, and efficient service.
FAQs
Q1. How long does it take to recover data from an inaccessible NAS drive?
The time depends on the number of drives, their size, and the type of failure. Simple logical errors can be fixed within a few hours, while physical or RAID failures may take several days. Professional NAS Data Recovery teams provide accurate estimates after evaluating your system.
Q2. Can I recover data myself if my NAS drive is not accessible?
Minor issues like network conflicts can sometimes be fixed at home. However, DIY attempts on corrupted RAID arrays or physically damaged drives can make things worse. It is safest to contact experts like Techchef Data Recovery.
Q3. What are the signs that my NAS might fail soon?
Common warning signs include slow performance, unusual noises from drives, frequent errors, inaccessible files, or degraded RAID alerts. Acting early improves the chance of successful recovery.
Q4. Will RAID rebuild or firmware updates affect data recovery?
Yes. Incorrect RAID rebuilds or failed firmware updates can overwrite important data. Always consult professional NAS hard drive failure recovery services before attempting such steps.
Q5. How can I prevent my NAS from becoming inaccessible in the future?
Regular backups, proper ventilation, using surge protectors or UPS, updating firmware, and monitoring drive health regularly are key preventive measures. Following these tips reduces the risk of costly NAS Data Recovery.