Hi, I’m Kritika, and I’ve always had a keen interest in solving issues like when a NAS server not detected and how these servers protect our digital life. But let’s be honest, nothing feels more frustrating than suddenly finding that your NAS server isn’t showing up. One moment you think your documents, photos, and work files are safe, and the next they seem completely out of reach. I’ve seen how challenging this real problem can be for people, whether it’s losing access to years of memories or struggling to continue important projects.
The good news is, in most cases, your data isn’t gone, it’s just trapped. With the right steps, you can often recover everything safely. That’s exactly what we’ll explore here: simple checks you can try yourself, effective recovery methods, and when it’s time to let professionals step in.
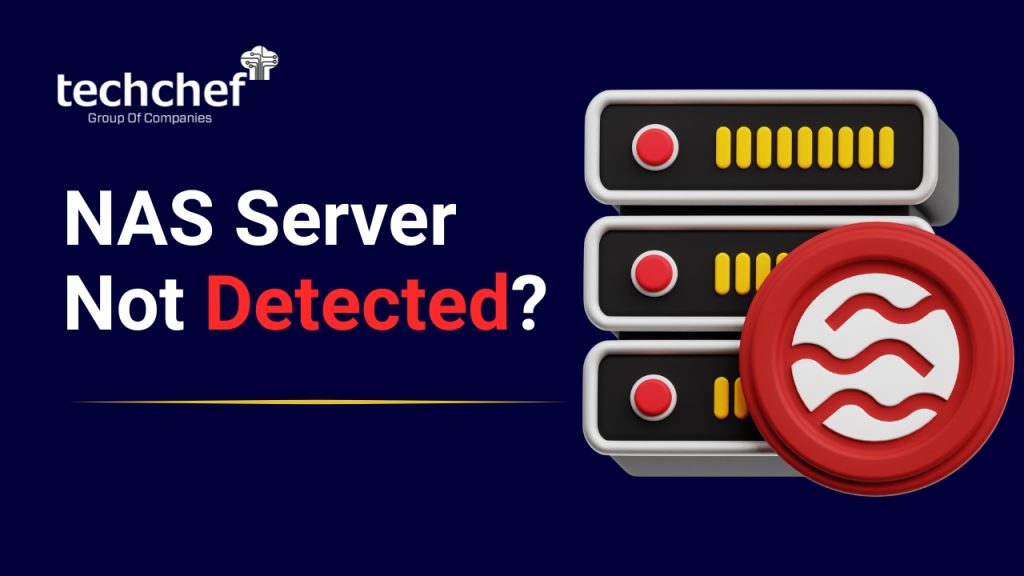
Common Reasons Your NAS Server May Not Be Detected
Your NAS server not detected problem can happen for many reasons, and knowing the cause can save you time and stress. Here are the most common issues and how they affect your NAS:
Network Issues
✅ Disconnected or loose LAN cables – Even a slightly unplugged cable can make your NAS invisible to your computer. Always check every connection carefully.
✅ Router or switch malfunctions – If your network devices are not working properly, your NAS may fail to communicate. Restarting them often helps.
✅ IP address conflicts or misconfigurations – If two devices on your network share the same IP, your NAS may not show up. Correcting IP settings can solve this.
Hardware Failure
✅ Failing HDDs or SSDs inside the NAS – Hard drives and SSDs can wear out over time. A failing disk can stop the NAS from being detected.
✅ Damaged RAID arrays – If your NAS uses RAID and one or more drives fail, the system may become inaccessible, resulting in NAS drive failure.
Firmware Corruption or Misconfiguration
✅ Outdated firmware – Older NAS firmware can develop bugs that prevent the system from starting correctly. Updating safely can fix this.
✅ Incorrect network settings – Wrong settings can hide your NAS on the network. Double-check IP addresses, gateways, and DNS settings.
Power Supply Problems
✅ Faulty PSU or unstable power – A NAS requires stable power. Any fluctuation can cause detection issues or even hardware damage.
✅ Tripped surge protectors or UPS failure – If your protective devices fail, your NAS may not power on correctly, making it invisible to your devices.
Did You Know? Many NAS detection issues are caused by simple network misconfigurations rather than serious hardware damage. Checking cables, connections, and IP settings first can save you a lot of trouble.
Initial Steps to Diagnose the Issue Safely
When your NAS server not detected, it is easy to feel stressed or tempted to try quick fixes. However, rushing can make the problem worse and even lead to permanent data loss. Following safe, careful steps can help you identify the issue without harming your precious files. Here is a step-by-step approach that anyone can follow:
Check Physical Connections
✅ Make sure all LAN cables are properly plugged in and not damaged. Even a slightly loose cable can stop your NAS from appearing on the network.
✅ Verify the power connection. Ensure the NAS is receiving stable power and the power adapter or plug is working correctly.
✅ Inspect your router, switch, or any network device that connects your NAS. Sometimes, the problem may be a faulty port or cable rather than the NAS itself.
Taking a few minutes to check these simple physical connections can solve many NAS detection issues without complicated steps.
Restart NAS and Network Devices
✅ Power cycle your NAS by switching it off, waiting for 30 seconds, and turning it back on.
✅ Restart your router and network switch as well. This refreshes network settings and often resolves IP conflicts.
✅ Wait for all devices to fully boot before checking connectivity again.
Restarting devices is a surprisingly effective solution. Over 40% of NAS not detected cases are fixed just by restarting both the NAS and the router.
Test Another Computer
✅ Try connecting to your NAS from a different computer or laptop.
✅ This helps you identify whether the problem is with your original device or the NAS itself.
✅ Ensure the second computer is on the same network and has proper permissions to access the NAS.
This simple test can save you hours of troubleshooting and isolate the issue quickly.
Observe LED Indicators
✅ Check the LEDs on your NAS carefully. They often indicate the system status or any errors.
✅ A blinking or red light may indicate drive failure, RAID issues, or firmware errors.
✅ Refer to your NAS manual or manufacturer’s website for exact LED meanings to avoid guessing.
LED indicators are like your NAS’s way of “talking” to you. Observing them carefully can prevent accidental mistakes that worsen the problem.
Did You Know? Restarting both the NAS and your router resolves detection issues in over 40% of cases. Combining this with careful observation of cables, connections, and LEDs can save you from unnecessary panic and protect your valuable data.
How to Attempt Safe Data Access
If your NAS server not detected even after checking connections and restarting devices, the next step is to attempt safe access to your data. At this stage, caution is key. Rushing or trying unverified methods can permanently damage your files. Here are some safe approaches you can follow:
Use Manufacturer Diagnostic Tools
✅ Most NAS brands such as Synology, QNAP, or Western Digital provide built-in diagnostic tools. These tools can check the health of your NAS, identify errors, and sometimes restore access without risking data loss.
✅ These tools are designed to work safely with your device and are the first step you should try before moving to more advanced methods.
✅ For example, Synology’s Assistant Tool can help locate your NAS on the network and provide basic repair options if the NAS is visible but not fully accessible.
Using official diagnostic tools is the safest way to start troubleshooting and often solves minor issues without needing professional intervention.
Access Data via SSH or Direct Disk Mounting
✅ If your NAS allows SSH (Secure Shell) access, you can connect to it remotely and attempt to copy critical files safely. SSH provides a read-only way to retrieve data, which avoids writing anything new to the drives.
✅ Another approach is direct disk mounting. This involves removing the NAS drives and connecting them to another computer or an external enclosure. The system can then read the data directly, bypassing the NAS operating system.
✅ This method is especially helpful if one of the NAS drives has failed but the data is still intact on other drives.
Example: If your NAS uses RAID 1 (mirroring), even if one drive is inaccessible, mounting the second drive externally can let you recover all your files safely without touching the original NAS.
Avoid Formatting or Reinitializing
✅ Do not format or reset your NAS drives at this stage. Many people make the mistake of thinking a reset will fix the problem. While it may make the NAS operational again, it can overwrite critical data and make recovery impossible.
✅ Even a simple reinitialization can destroy metadata, file permissions, and RAID structure, leaving professional recovery as the only option.
Did You Know? Mounting drives externally instead of reinitializing the NAS can prevent permanent data loss. This method keeps all your original data intact and increases the chances of full recovery.
Additional Tips for Safe Access
✅ Always work in a static-free environment when handling NAS drives physically. This prevents accidental electrical damage.
✅ Label your drives carefully before removing them, especially in RAID setups. The order of drives can be critical for RAID recovery.
✅ If you are unsure about mounting drives or accessing via SSH, it is better to contact professionals rather than risk losing your data.
Taking these safe steps ensures that even if your NAS drive is inaccessible, you still have a high chance of recovering your important files without causing further harm.
When to Consider Professional Data Recovery Services
While DIY methods can help in some cases, there are situations where attempting recovery on your own can put your NAS data at serious risk. Knowing when to seek professional help is critical for protecting your valuable files and avoiding permanent loss.
Signs You Should Call Professionals
✅ Unusual noises from the NAS drives – Clicking, grinding, or beeping sounds often indicate mechanical failure inside the hard drives. Continuing to power the NAS can worsen the damage.
✅ Multiple drives failing simultaneously – If more than one drive in your RAID array fails, the risk of permanent data loss increases exponentially. Professionals can handle such situations with proper tools.
✅ RAID array corruption – RAID setups are complex, and a single wrong move can make recovery impossible. If your RAID is showing errors, missing drives, or degraded status, professional intervention is essential.
✅ Failed attempts at DIY recovery – If you’ve tried basic troubleshooting or mounting drives and still cannot access your data, it’s safer to stop and call experts rather than risk overwriting critical information.
Benefits of Professional Recovery
✅ Cleanroom recovery – Professional labs use dust-free environments to open and repair drives safely. This prevents physical contamination that could destroy data permanently.
✅ RAID reconstruction – Experts can rebuild complex RAID configurations to access data without losing file structure. Attempting RAID fixes yourself can accidentally scramble the array.
✅ Preservation of metadata and file structure – Professionals ensure that not just your files, but also important metadata like timestamps, permissions, and folder hierarchy, remain intact.
✅ Advanced tools and techniques – Certified recovery labs have access to specialized software for NAS data recovery, including tools that can retrieve data from corrupted filesystems or inaccessible NAS drives.
Did You Know? Attempting DIY RAID reconstruction without proper expertise can make professional recovery impossible. Many cases we see at Techchef involve users who unintentionally worsened their situation by trying unverified methods.
At Techchef, we specialize in NAS not detected recovery and lost NAS drive recovery, handling each case with care, precision, and the latest technology. Whether your NAS has mechanical issues, RAID failures, or firmware corruption, our team ensures the highest chance of safely restoring your data.
Example: One client had a 4-bay NAS where two drives failed simultaneously. After trying to recover the RAID array themselves, they accidentally switched the drive order. Our experts at Techchef reconstructed the RAID and recovered over 95% of their files, including family photos, work documents, and financial records. This demonstrates how professional intervention can save critical data that DIY methods might risk.
Preventive Measures for the Future
Recovering your NAS data safely is important, but preventing future problems is even better. With a few simple steps, you can significantly reduce the risk of losing data and avoid the stress of a NAS server not detected scenario. Here are practical measures you can follow:
Regular Backups
✅ Always maintain multiple copies of your data. This includes cloud storage, local external drives, or even another NAS.
✅ For example, you could keep one backup on a cloud service like Google Drive or Dropbox, and another on an external hard drive stored in a safe place.
✅ Regular backups ensure that even if your NAS fails completely, you can restore your important files quickly without panic.
Tip: Schedule automatic backups weekly or daily depending on how frequently your data changes. This ensures nothing is missed and reduces manual effort.
Monitor NAS Health
✅ Most NAS devices come with built-in monitoring tools to check hard drive health, disk temperatures, and system performance.
✅ By reviewing these reports regularly, you can catch potential issues like a failing drive or RAID degradation before it becomes a major problem.
✅ Some NAS models allow notifications via email or mobile apps, so you are immediately alerted about issues.
Example: A client noticed their NAS software alerting them about high disk temperatures. Acting immediately prevented permanent NAS drive failure and saved all their data.
Power Protection
✅ Sudden power cuts or fluctuations can damage your NAS drives. Using a UPS (Uninterruptible Power Supply) or surge protector helps protect your device.
✅ Even short power interruptions can corrupt files or crash RAID arrays.
✅ Ensure your UPS has enough backup time to safely power down your NAS during outages.
Tip: Place your NAS in a location with stable electricity and avoid connecting it to overloaded power strips.
Routine Updates
✅ Keep your NAS firmware and network settings updated to avoid software glitches or security vulnerabilities.
✅ Updates often fix bugs that could prevent your NAS from being detected or cause performance issues.
✅ Regularly review network configurations and access permissions to ensure your NAS remains secure and functional.
Additional Tips
✅ Avoid storing all critical data in a single NAS device. Use multiple storage locations if possible.
✅ Label and document your RAID configuration and drive order. This can save time and reduce errors if a recovery is ever needed.
✅ Periodically test your backups to ensure files can be restored successfully. A backup is only valuable if it works when you need it most.
Did You Know? Even enterprise-grade NAS servers can fail unexpectedly. The most reliable safeguard against data loss is regular, well-managed backups combined with proactive monitoring and protection.
By implementing these preventive measures, you reduce the risk of emergencies, protect your important files, and ensure peace of mind knowing your data is safe.
Conclusion
Facing a NAS server not detected error can feel overwhelming, but remember that most issues can be diagnosed and solved safely. By carefully checking connections, using safe access methods, and knowing when to call in professionals, you can protect your valuable information and regain peace of mind.
At Techchef, we’ve guided countless clients through NAS data recovery, ensuring their memories, work, and critical files are restored safely. Don’t panic if your NAS drive is inaccessible. With the right approach and expert help, your data can still be recovered reliably.
✅ Call us now for a free consultation at 1800-313-1737 and let us assist you in getting your precious data back safely. Visit our website for more details: www.techchef.in
Your data deserves the best care, and at Techchef, we make sure every recovery is handled with precision, safety, and trust.
FAQs
1. Can I recover NAS data if the server is completely dead?
Yes, professional services can often recover data from dead NAS servers using cleanroom recovery and direct disk access techniques.
2. Is it safe to open the NAS and remove the drives myself?
It’s generally not recommended unless you have experience. Mishandling drives can cause permanent data loss.
3. How long does professional NAS data recovery usually take?
Recovery times vary based on the number of drives, RAID configuration, and damage level. Typically, it ranges from 24 hours to a few days.
4. Can RAID configurations complicate recovery?
Yes, RAID failures make recovery more complex. Professionals can reconstruct RAID arrays safely.
5. What are the chances of recovering data from water or fire-damaged NAS devices?
With immediate action and professional handling, significant data recovery is often possible, though success rates depend on damage severity.