A failed RAID array is one of the most stressful situations any IT administrator or business owner can face. When those drives go dark, it’s not just data — it’s operations, revenue, and reputation on the line. I’ve seen it happen to small startups and Fortune 500 companies alike. Let me walk you through everything you need to know about RAID data recovery — what causes it, what you should never do, and how professionals recover your data safely and completely.
What Is RAID — And Why Does It Fail?
RAID (Redundant Array of Independent Disks) is a technology that combines multiple physical drives into one logical unit to improve performance, redundancy, or both. It’s widely used in servers, NAS devices, workstations, and enterprise storage systems. RAID configurations like RAID 0, RAID 1, RAID 5, RAID 6, and RAID 10 each offer different trade-offs between speed and fault tolerance.
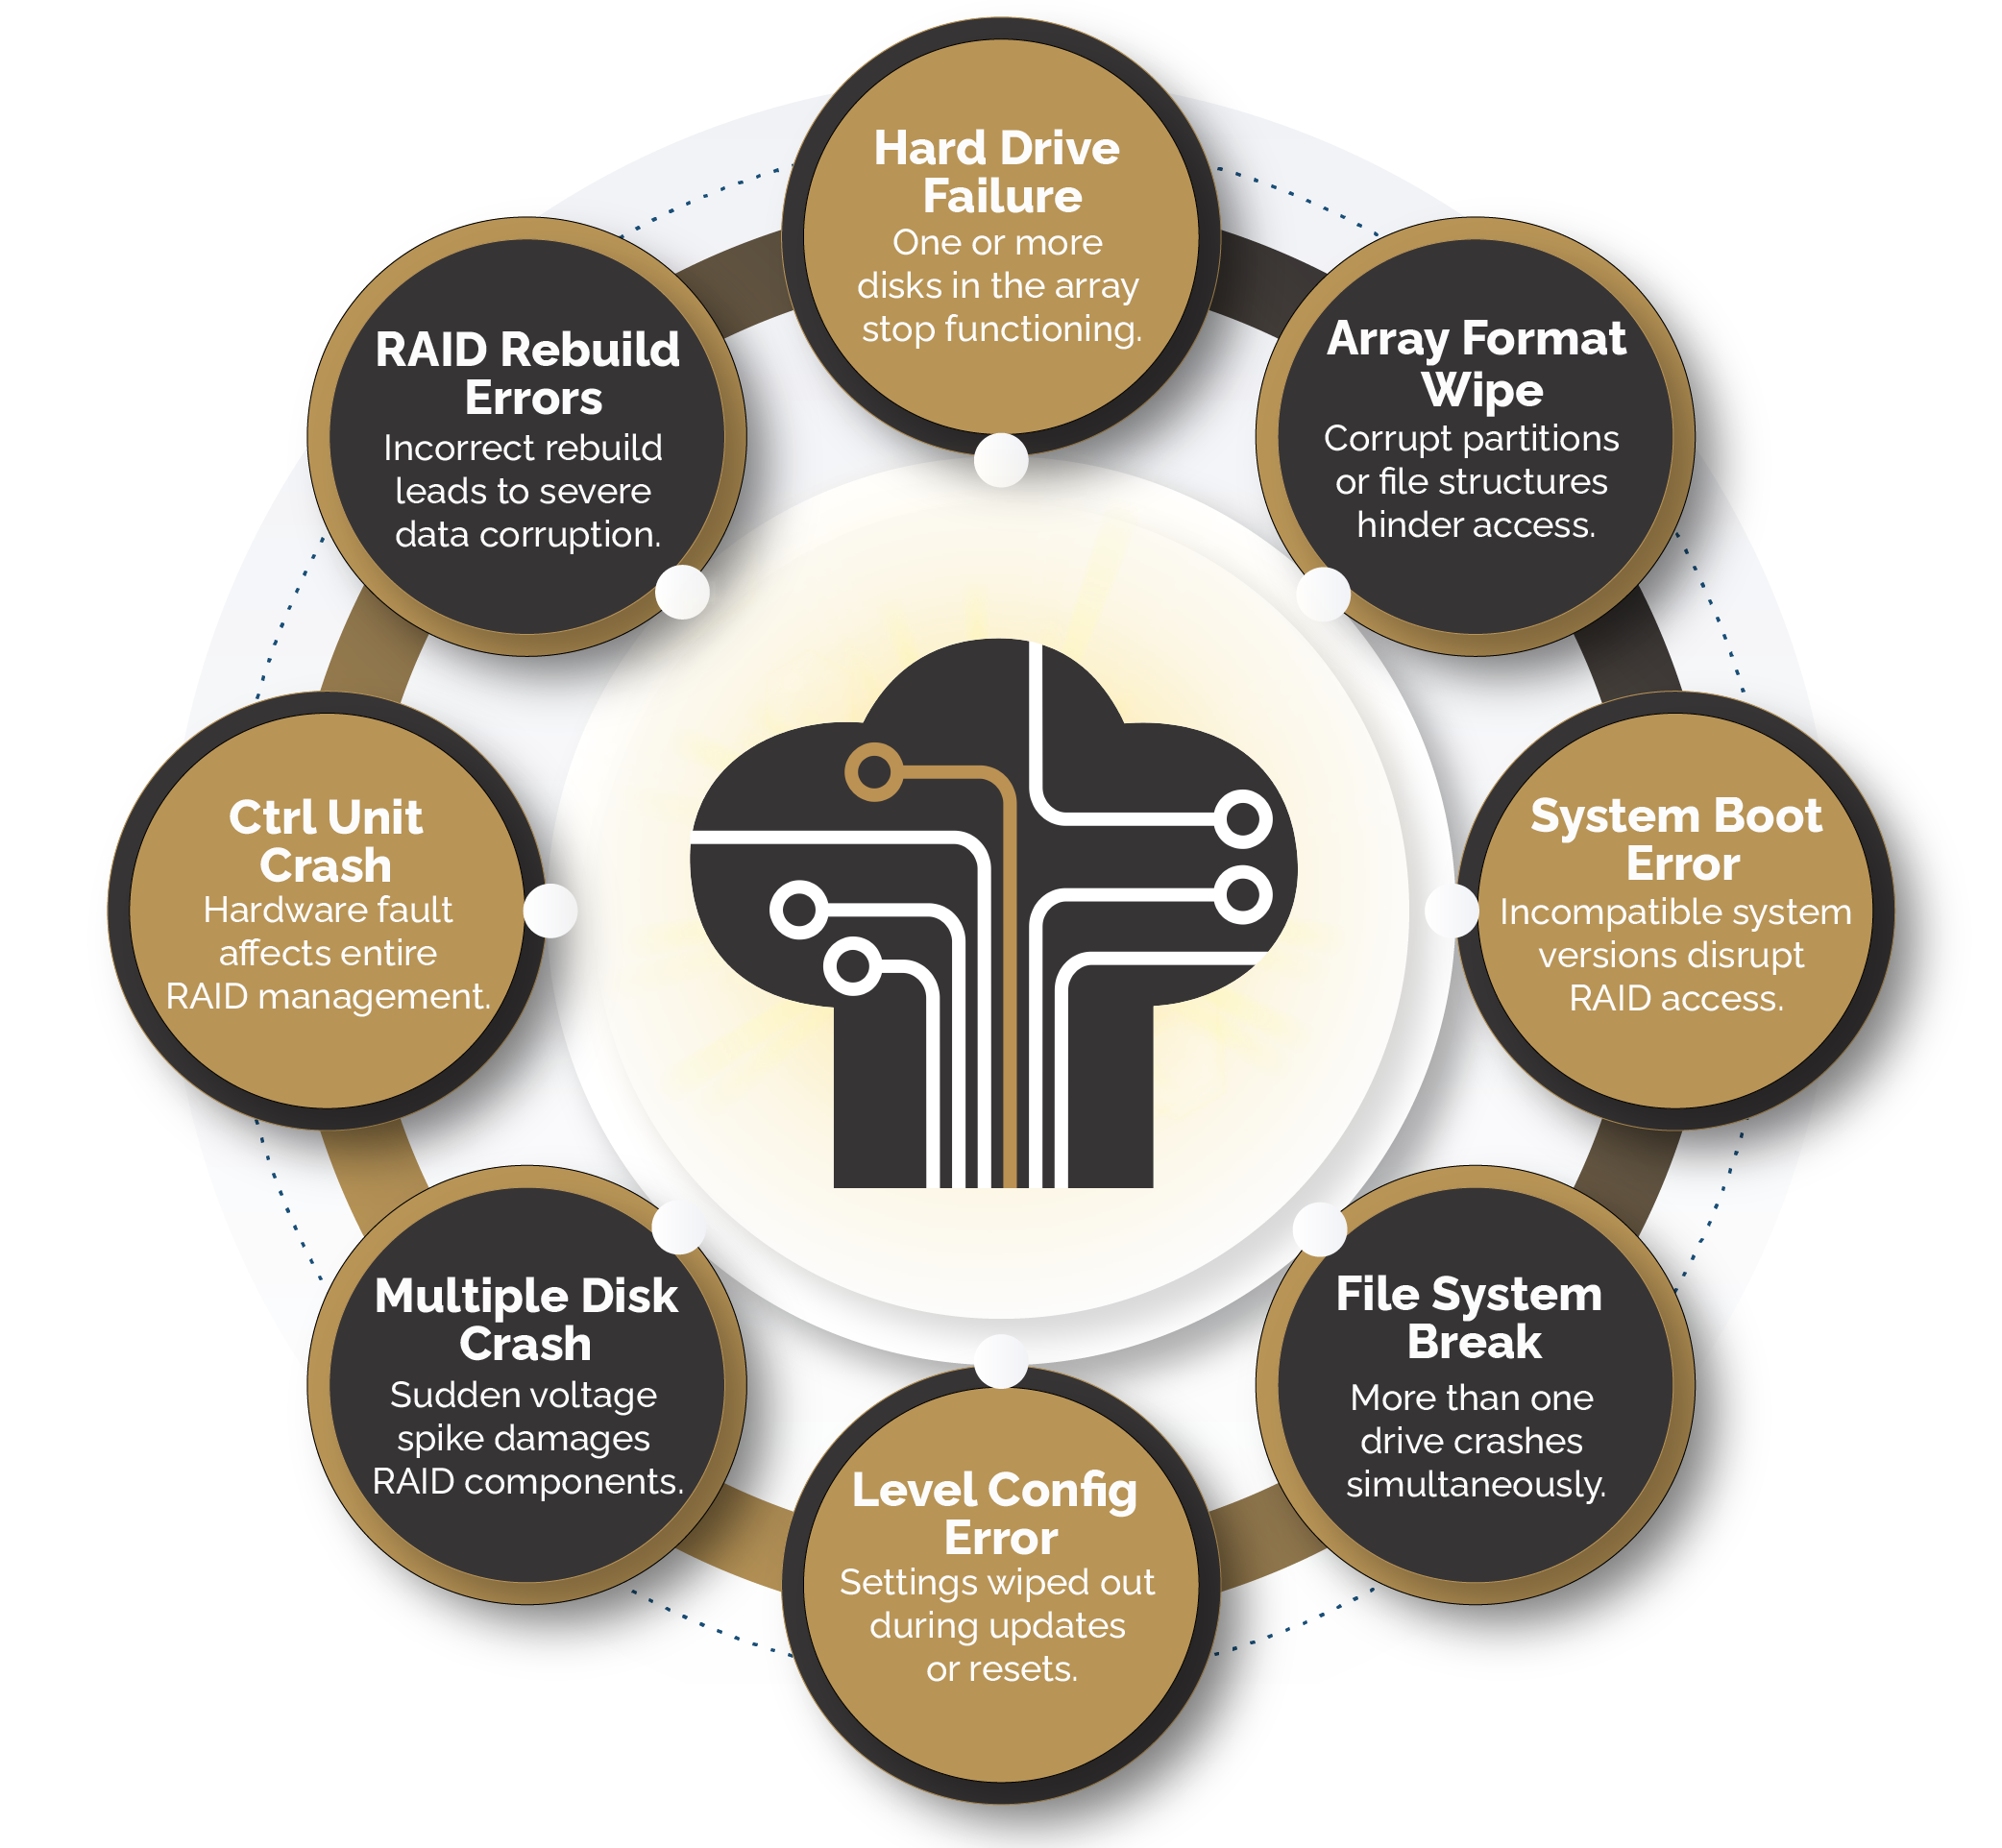
Here’s the thing most people misunderstand: RAID is not a backup solution. It’s a resilience strategy. And resilience has limits. RAID arrays fail — more often than you’d expect — for a variety of reasons:
- ➝ Multiple simultaneous drive failures (especially in RAID 5 with large-capacity drives)
- ➝ Accidental RAID rebuild or reconfiguration on a degraded array
- ➝ Controller failure or firmware corruption
- ➝ Power surges, voltage spikes, or sudden power loss
- ➝ Human error — wrong drives removed, array deleted, or partitions reformatted
- ➝ RAID rebuild failure mid-process, corrupting parity data
- ➝ Logical corruption of the RAID metadata or file system
💡 Did You Know? According to industry data, approximately 70% of RAID 5 arrays that fail do so during the rebuild process itself — the very operation meant to restore the array. This happens because rebuilding a degraded RAID 5 puts extreme read stress on surviving drives that are already aged or weakened.
The Moment Your RAID Fails: What NOT to Do
When an array goes offline, the first instinct is to act fast. I completely understand that pressure — especially when production systems are down. But rushing is precisely how recoverable situations become unrecoverable ones.
Here is what you should never do the moment your RAID array fails:
- ➝ Do not run chkdsk, fsck, or disk repair tools on a failed RAID volume — these tools can overwrite critical metadata
- ➝ Do not attempt a hot-swap or drive replacement without understanding the array’s current state
- ➝ Do not power-cycle the system repeatedly — every spin-up adds mechanical stress to already stressed drives
- ➝ Do not initialize or format any member drives, even if Windows or Linux prompts you to
- ➝ Do not use free data recovery software directly on RAID member drives — most are not designed for complex RAID structures
- ➝ Do not attempt a forced rebuild on a degraded array without first imaging every member drive
The golden rule of RAID data recovery is simple: the less you do, the more options you preserve.
Understanding RAID Levels and Their Recovery Complexity
Not all RAID failures are created equal. Recovery difficulty varies significantly depending on the RAID level and the nature of the failure.
RAID 0 — Striping
RAID 0 has zero redundancy. If even one drive fails, all data across every stripe is potentially compromised. Recovery requires reconstructing stripe order, chunk size, and rotation without any parity data to guide the process. This is where professional forensic tools make the real difference.
RAID 1 — Mirroring
RAID 1 is the most forgiving for recovery since data is duplicated across drives. Even with one failed mirror, the other often holds complete data. However, logical corruption affects both mirrors simultaneously — so mirroring doesn’t protect against software-level failures or accidental deletion.
RAID 5 and RAID 6
RAID 5 can tolerate one drive failure; RAID 6 can tolerate two. But both are vulnerable to rebuild failures, simultaneous drive degradation, and parity corruption. Recovery involves reconstructing parity logic, determining stripe order, and reassembling data from multiple drives — requiring specialized software and expert analysis.
RAID 10 — Striped Mirror
RAID 10 combines RAID 1 and RAID 0. It’s resilient but can still fail if the wrong combination of drives fails across mirror pairs. Recovery typically involves identifying which mirror pair is intact and reconstructing from there.
💡 Did You Know? In a standard RAID 5 array using 4TB drives, a full rebuild can take 12–24 hours. During that entire window, the workload falls on surviving drives. The probability of a second drive failing during this rebuild window is significantly higher than normal — a phenomenon known as the URE (Unrecoverable Read Error) problem — which is why so many RAID 5 arrays fail during recovery, not before it.
Step-by-Step: How Professional RAID Recovery Works

If you’re working with a professional recovery service — and for most serious failures, you absolutely should — here’s what the process looks like. Understanding it helps you ask the right questions and set realistic expectations.
➝ Step 1 — Diagnostic Assessment of All Member Drives
Each drive in the array is individually imaged and assessed using sector-level cloning tools. Any physically damaged drives are addressed in a cleanroom environment before any logical analysis begins. The goal is to create working clones without further stressing the originals.
➝ Step 2 — RAID Parameter Identification
Engineers identify the RAID parameters — stripe size, block order, parity rotation, and drive sequence — either from the controller metadata or by manual forensic analysis. In cases of controller failure or metadata corruption, this is done entirely by examining raw drive data.
➝ Step 3 — Virtual RAID Reconstruction
Using the cloned drives and identified parameters, the array is virtually reconstructed in software. No original drives are touched during this phase. This virtual reconstruction allows engineers to test configurations before committing to any write operations.
➝ Step 4 — File System and Data Extraction
Once the virtual array is stable, file system analysis is performed to locate and extract target data — whether it’s specific files, databases, or full volume recovery. Engineers prioritize critical data and document recovery completeness throughout.
➝ Step 5 — Verification and Secure Delivery
Recovered data is verified for integrity, packaged securely, and returned to the client. Reputable services also provide a detailed recovery report — important for insurance claims or compliance documentation.
Can You Recover a RAID Array Yourself?
The honest answer is: sometimes, yes — but only in very limited scenarios. If your RAID controller has failed but all drives are healthy, and you know your exact RAID parameters, tools like ReclaiMe, UFS Explorer, or R-Studio can help reconstruct the array virtually on a healthy system.
However, DIY recovery carries serious risks. One wrong parameter in a RAID 5 reconstruction — incorrect stripe size, wrong drive order, flipped parity direction — will produce corrupt output that looks like valid data but isn’t. You might end up with files that open but contain garbage, or databases that appear complete but are internally broken.
My recommendation: attempt DIY only when you have verified sector-level clones of every member drive — never on the originals.
Case Study: Fintech Startup Recovers 8-Drive RAID 6 Array
A mid-sized fintech company was running a critical transaction database on an 8-drive RAID 6 NAS. Following a power surge during a monsoon event, three drives failed simultaneously — one more than RAID 6’s maximum tolerance. Under pressure, the IT team attempted a forced rebuild, which made the situation significantly worse by corrupting parity tables across the surviving drives.
When brought to a professional recovery lab, engineers cloned all eight drives before doing anything else. Using forensic analysis, they reconstructed the RAID parameters manually since the controller metadata was completely corrupted. The virtual RAID was successfully assembled, and the MySQL transaction database was recovered with 99.4% integrity — including the last 11 hours of transactions before the failure.
The company’s estimated exposure was over ₹2 crore in unreconciled transactions. Professional recovery cost a fraction of that, and the entire process was completed within 72 hours using cleanroom facilities and enterprise-grade recovery tools. The key lesson? They called a professional immediately after the forced rebuild made things worse — rather than continuing to experiment on their own.
How to Choose the Right RAID Recovery Service
Not all data recovery services are equipped to handle complex RAID failures. When evaluating a provider, here’s what actually matters:
- 🛡️ ISO-certified cleanroom facilities — essential for physically damaged drives; prevents contamination during head or platter-level work
- 🛡️ Sector-level imaging tools — tools like PC-3000 UDMA allow cloning even from degraded or partially failed drives
- 🛡️ No data, no charge policy — reputable labs only charge if they successfully recover your data
- 🛡️ Transparent diagnostics — a professional service provides a full assessment before you commit to recovery
- 🛡️ Experience across RAID types and NAS brands — Synology, QNAP, Dell PowerEdge, HPE ProLiant, and custom server builds all have unique nuances
Preventing Future RAID Failures
Once you’ve recovered from a RAID failure — and I sincerely hope you do — use that experience to build a more resilient infrastructure. Here’s what I’d strongly recommend:
- ⚠️ Implement the 3-2-1 backup rule: 3 copies, on 2 different media types, with 1 stored offsite
- ⚠️ Monitor drive health proactively using S.M.A.R.T. alerts and RAID controller event logs
- ⚠️ Replace drives proactively at 3–4 years of age — don’t wait for failures to tell you it’s time
- ⚠️ Use a UPS (Uninterruptible Power Supply) to protect against power surges and sudden outages
- ⚠️ Test your RAID rebuild process in a staging environment before you ever need it in production
Remember this: RAID keeps your data available — backup keeps your data safe. You need both, and one should never substitute for the other.
Conclusion: Don’t Let a Failed RAID Array Become Permanent Data Loss
A RAID failure feels catastrophic in the moment — but in most cases, your data is still recoverable if you act carefully and quickly. The biggest mistake people make is trying too hard too fast: forcing rebuilds, running repair tools, or attempting DIY recovery without proper clones. That’s when recoverable situations become permanent losses.
If your RAID array has failed — whether it’s a RAID 5 with two failed drives, a RAID 6 after a power event, or a RAID 0 server that suddenly won’t mount — the smartest first move is to stop, power down, and call a professional.
That’s where Techchef Data Recovery comes in.
With years of hands-on experience recovering data from the most complex RAID configurations, Techchef’s certified engineers and technicians have helped businesses across India get their critical data back — from SSD and HDD-based arrays to CCTV storage systems and enterprise RAID servers. Their ISO-certified lab with Class 100 cleanroom facilities ensures that even physically damaged, broken, or water-affected drives get the safest possible treatment during recovery.
Whether it’s a small business NAS or a multi-drive enterprise RAID server, TechChef operates on a simple principle: no data recovered, no charge. You get a free diagnostic assessment before committing to anything.
📍 Visit: www.techchef.in
📦 Book a free pickup & drop service from your location
📅 Schedule an appointment at your convenience
📞 Call Toll-Free: 1800-313-1737
Don’t wait. Every hour after a RAID failure increases the risk of further data degradation. Reach out to Techchef today — your data deserves expert hands.
FAQ
Q1. My RAID array is showing as degraded but still working — should I be worried?
Yes. Degraded means one drive has already failed and you’re running with zero protection. One more failure and everything is gone. Don’t wait — act now.
Q2. I accidentally deleted files from my RAID volume. Can they still be recovered?
Most likely yes — but stop using the array immediately. Every new file written can overwrite your deleted data. The sooner you stop, the better your chances.
Q3. Is it safe to run a RAID rebuild after one drive fails?
Not without checking first. If surviving drives show any S.M.A.R.T. errors, a rebuild can trigger a second failure and make things far worse. Always image the drives before rebuilding.
Q4. How long does professional RAID data recovery usually take?
Logical failures typically take 24–72 hours. If drives need physical/cleanroom work, expect 3–7 business days. A good lab will give you a clear timeline after the free diagnostic.
Q5. Will recovery work even if my RAID controller is dead?
Yes. The data lives on the drives, not the controller. Engineers reconstruct the array virtually using the raw drives — no working controller needed.